GET THE APPS · AVAILABLE ON ANDROID
JCI India
 Download now for Android
Vrixaa Connect
Download now for Android Vrixaa Connect / JCI
Your JCI community.
Closer than ever.
Your Local Organization, your zone and the people who make it all happen. Connected in one place.
Vrixaa Connect brings individuals, organizations and networks together. In your JCI space, share updates, meet members, explore businesses, join conversations and take part in events.
One account connects the Global Space with your JCI network. Verify your existing membership through your Local Organization (LO) to get started.
See how it works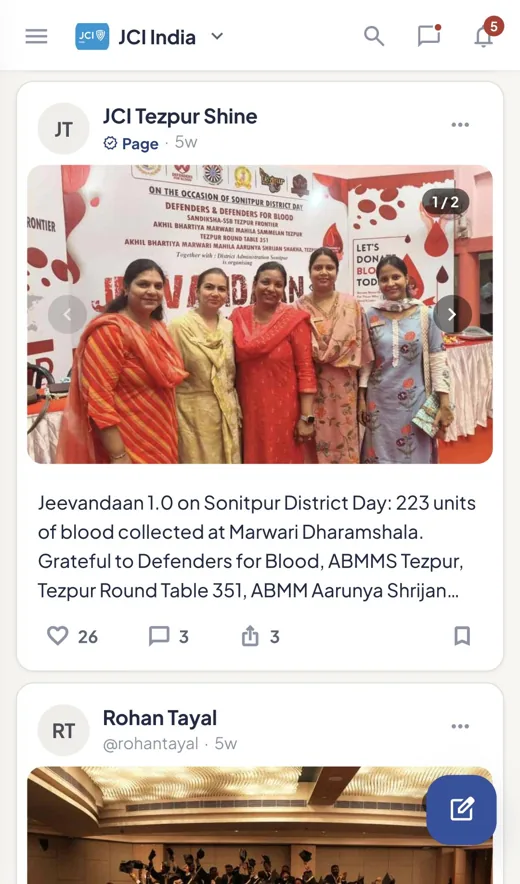
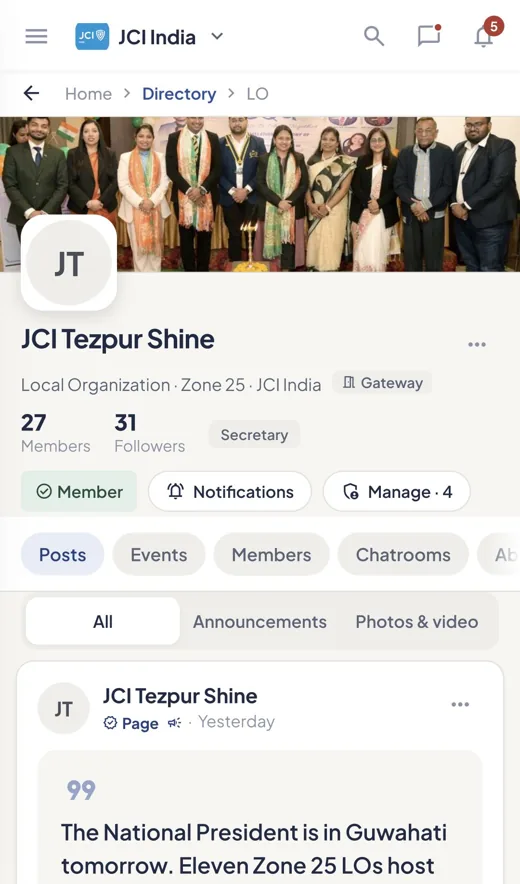
Share your moments
Personal updates and news from your JCI community.
Meet your network
Discover members, exchange ideas and build connections.
Discover businesses
Find member businesses and recommendations.
Take part in events
Explore gatherings, register and find your tickets.
Stay in the conversation
Keep in touch through messages and community chatrooms.
YOUR QUICK START GUIDE
A little guidance.
A lot to connect with.
Choose a topic for a short, step-by-step walkthrough. Open any screenshot for a closer look.
01Join your JCI communityCreate your account, choose your LO and verify your membership.
Create and verify your account
Choose Create account, enter your details and verify your email using the code or link in your inbox. Already have an account? Sign in.
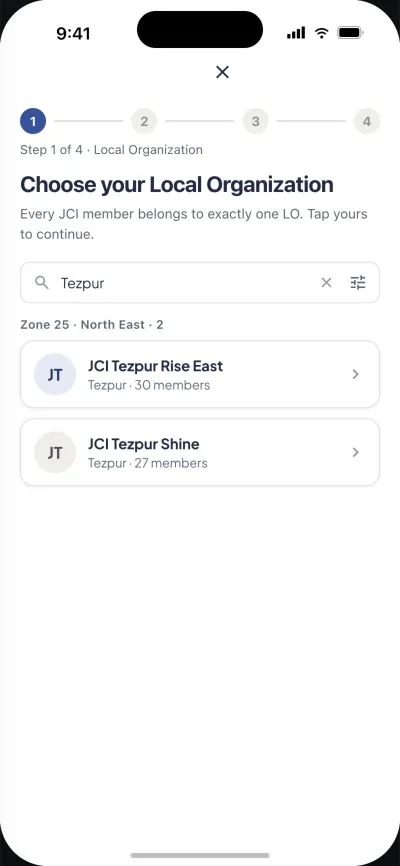
Find your Local Organization
In the Global Space, open Discover → Networks → JCI India → Join. Search for your Local Organization (LO), select it and complete its joining form.
Confirm your membership
Use the email on your LO’s membership roster to verify, or send a request to the listed LO admins for manual confirmation. Account verification and membership verification are separate steps.
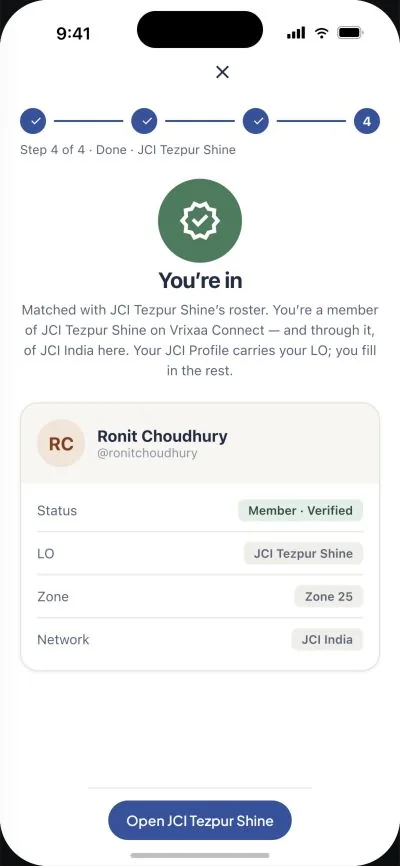
Check the result
“You’re in” means your membership is verified. Open your LO to continue. “Request sent” means approval is pending; you can use the Global Space while you wait.
This flow verifies an existing JCI membership. To become a JCI member, contact your Local Organization. Joining-form fields can vary by LO.
02Share a personal postWrite an update and share it with the right audience.
Open the composer
Open Feed and tap the compose button. Choose Post for a text update, Photo / Video for media, or Blog for a longer story.
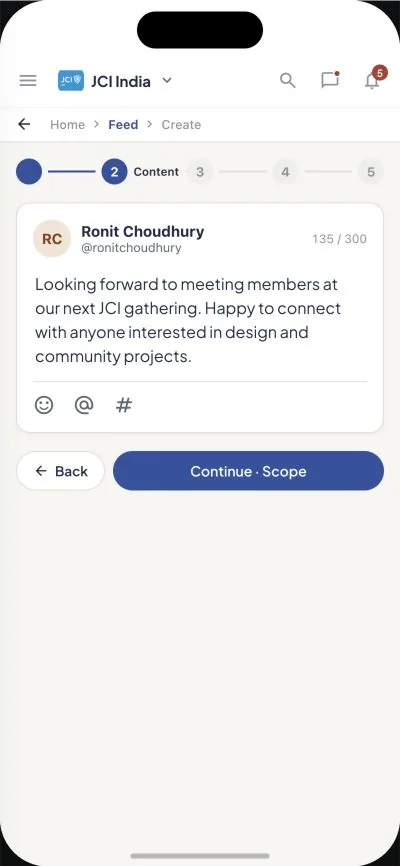
Add your content and audience
Write your update, then choose its destination: the Global Space, your network, or both. Review the visibility setting before continuing.
Review and publish
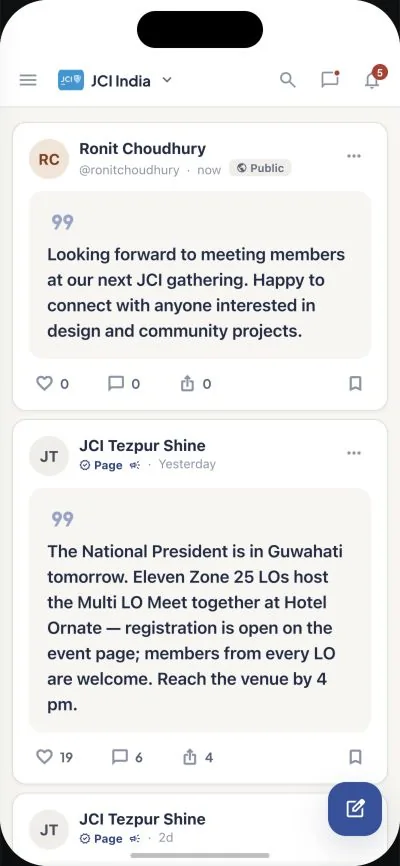
Choose a primary category, check the preview and tap Publish. Your personal post appears under your own name in the selected feed.
Keep the conversation going
Open a post to read comments. Use the action row to react, comment, share or save an update.
Check both the destination and visibility before publishing, especially when switching between the Global Space and JCI India.
03Explore Business ConnectFind member businesses, make contact and ask for recommendations.
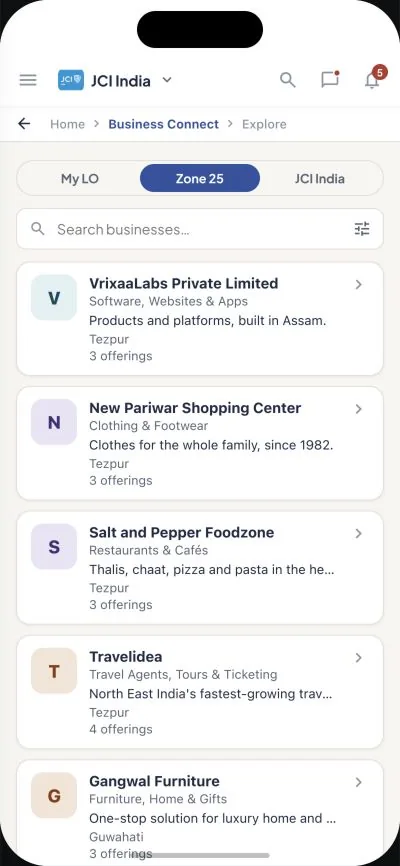
Choose where to look
Open Business Connect → Explore. Select My LO, Zone 25 or JCI India, then search or filter by category and location.
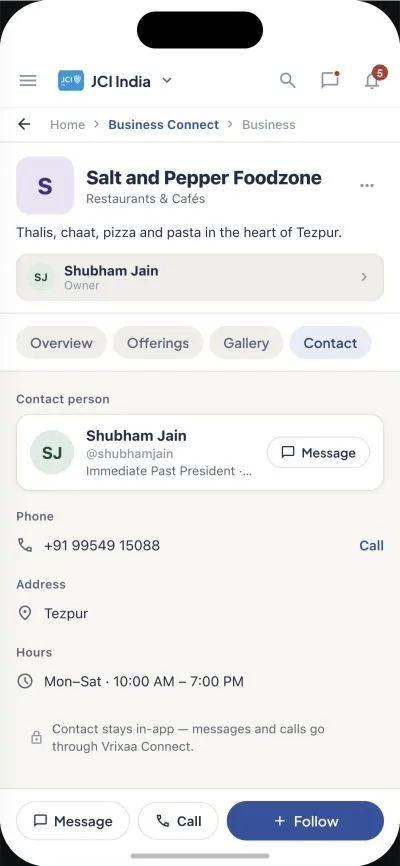
Get to know a business
Open a listing to review its overview, offerings, gallery and contact information. Use the available Message or Call option to reach out.
Ask your network
Open Enquiry to post a specific requirement. Members can recommend listed businesses. Return to My enquiries to read responses and mark a completed request resolved.
List your own business
In My businesses, choose Add business. Select or create the owning entity, complete the details and publish the profile.
Business Connect helps you discover and contact businesses. Confirm prices, availability and arrangements directly with the business.
04Build your networkIntroduce yourself, discover members and make connections.
Complete your JCI Profile
Open Networking → My JCI Profile. Add your introduction, work and skills, and set what you are open to, such as mentoring or collaboration.
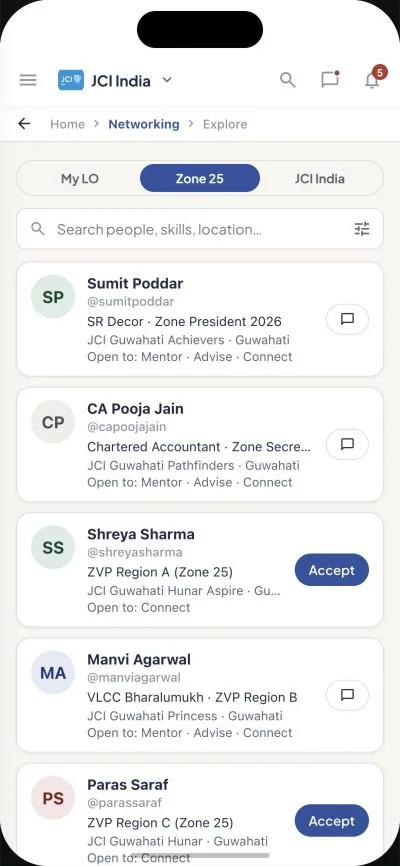
Find the right people
Open Explore and choose My LO, Zone 25 or JCI India. Search by name, skill or location, and open a profile to learn more.
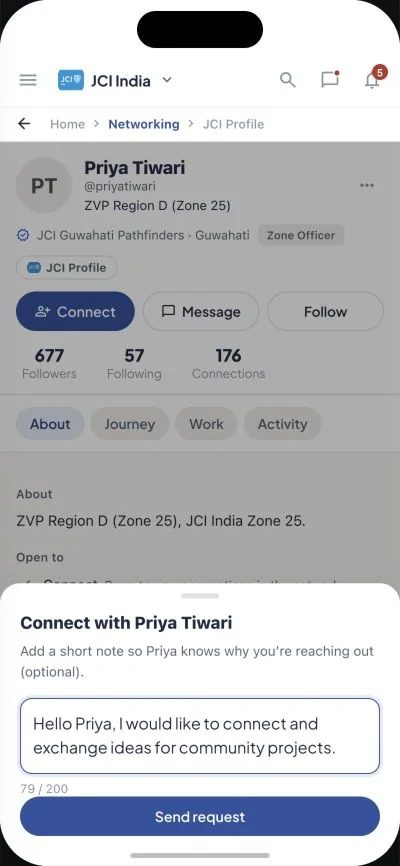
Send an invitation
Tap Connect and add a short introduction if you wish. A Pending label means the other member has not yet accepted.
Stay involved
Use Connections to manage invitations. Requests let you ask members for help, while Conversations let you join community discussions.
Your JCI Profile is separate from your public profile. Keep its details and your networking preferences up to date.
05Find an event and take partBrowse events, register and keep your ticket handy.
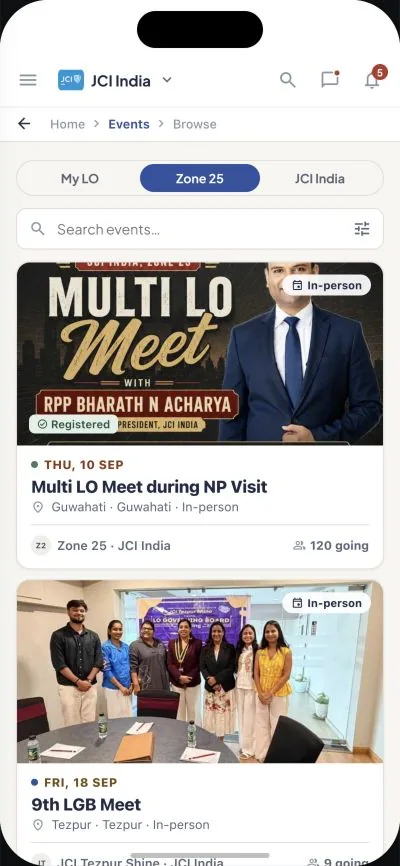
Discover what is happening
Open Events → Browse, or use Calendar to look by date. Choose your scope and use search or filters to narrow the list.
Read the details and register
Open an event, review its time, venue and registration information, then tap Register. Complete any questions and consent requested by the organizer.
Check your registration status
“You’re registered” confirms your place. “Request sent” means the organizer still needs to approve your request.
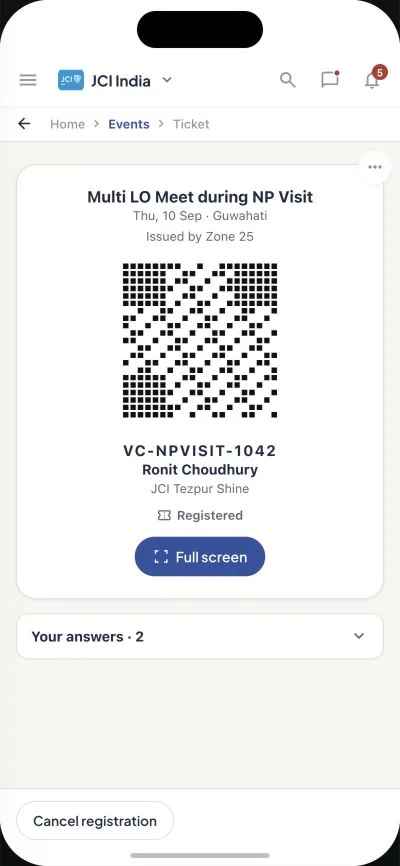
Return to your ticket
Open My Events to find your registration and ticket. Use the QR at check-in, and check the event’s Agenda, Updates and People tabs for further information.
A pending registration is not a confirmed place. Use your own ticket from the app; screenshots here are examples from the design.
Screenshots show example content from the app design. Your LO’s form, available actions and event details may differ.
For membership approval, contact your LO admins. For app support, email our team.